✅ How to Verify Your Domain for Email Sending (SPF, DKIM, DMARC)
Goal:
Make sure your domain is trusted to send emails using AWS SES (Simple Email Service), so that your emails don’t land in spam folders.
Step-by-Step Guide
1. Log in to your Domain Provider (like GoDaddy, Namecheap, Cloudflare, etc.)
This is the service where you bought your domain (like example.com).
2. Find Your DNS Settings
Once logged in:
- Go to your DNS Management or DNS Settings
- You’ll see a list of records (like A, CNAME, TXT)
3. Add the Following 3 DNS Records
You will add 3 types of records:
SPF, DKIM, and DMARC
✅ A. Add SPF Record
Type: TXT
Name (Host): @ or leave blank (depending on your provider)
Value:
v=spf1 include:amazonses.com ~all
This tells the internet: “AWS is allowed to send emails from my domain.”
✅ B. Add DKIM Records (Usually 3 Records)
Type: CNAME
You will get 3 DKIM records from AWS SES when you verify your domain.
They will look something like this:
| Name (Host) | Type | Value |
|---|---|---|
abc123._domainkey.example.com | CNAME | abc123.dkim.amazonses.com |
def456._domainkey.example.com | CNAME | def456.dkim.amazonses.com |
ghi789._domainkey.example.com | CNAME | ghi789.dkim.amazonses.com |
? These tell email providers to trust the email is really from you (digitally signed).
✅ C. Add DMARC Record (Optional but Recommended)
Type: TXT
Name (Host): _dmarc
Value:
v=DMARC1; p=none; rua=mailto:you@example.com
p=nonemeans you’re just monitoring (not blocking anything yet).rua=mailto:you@example.comis where reports will be sent.
? DMARC protects your domain from being spoofed and helps you track email issues.
4. Save All Records and Wait ⏳
DNS changes can take up to 48 hours, but often happen faster.
Tips
- Use https://mxtoolbox.com/emailhealth to check your SPF, DKIM, and DMARC records.
Helpful Reference Links
- Cloudflare: DMARC, SPF, DKIM Setup Guide (Official)
- Cloudflare: How to Add DMARC (Step-by-Step)
- GoDaddy: Add SPF, DKIM, DMARC Records
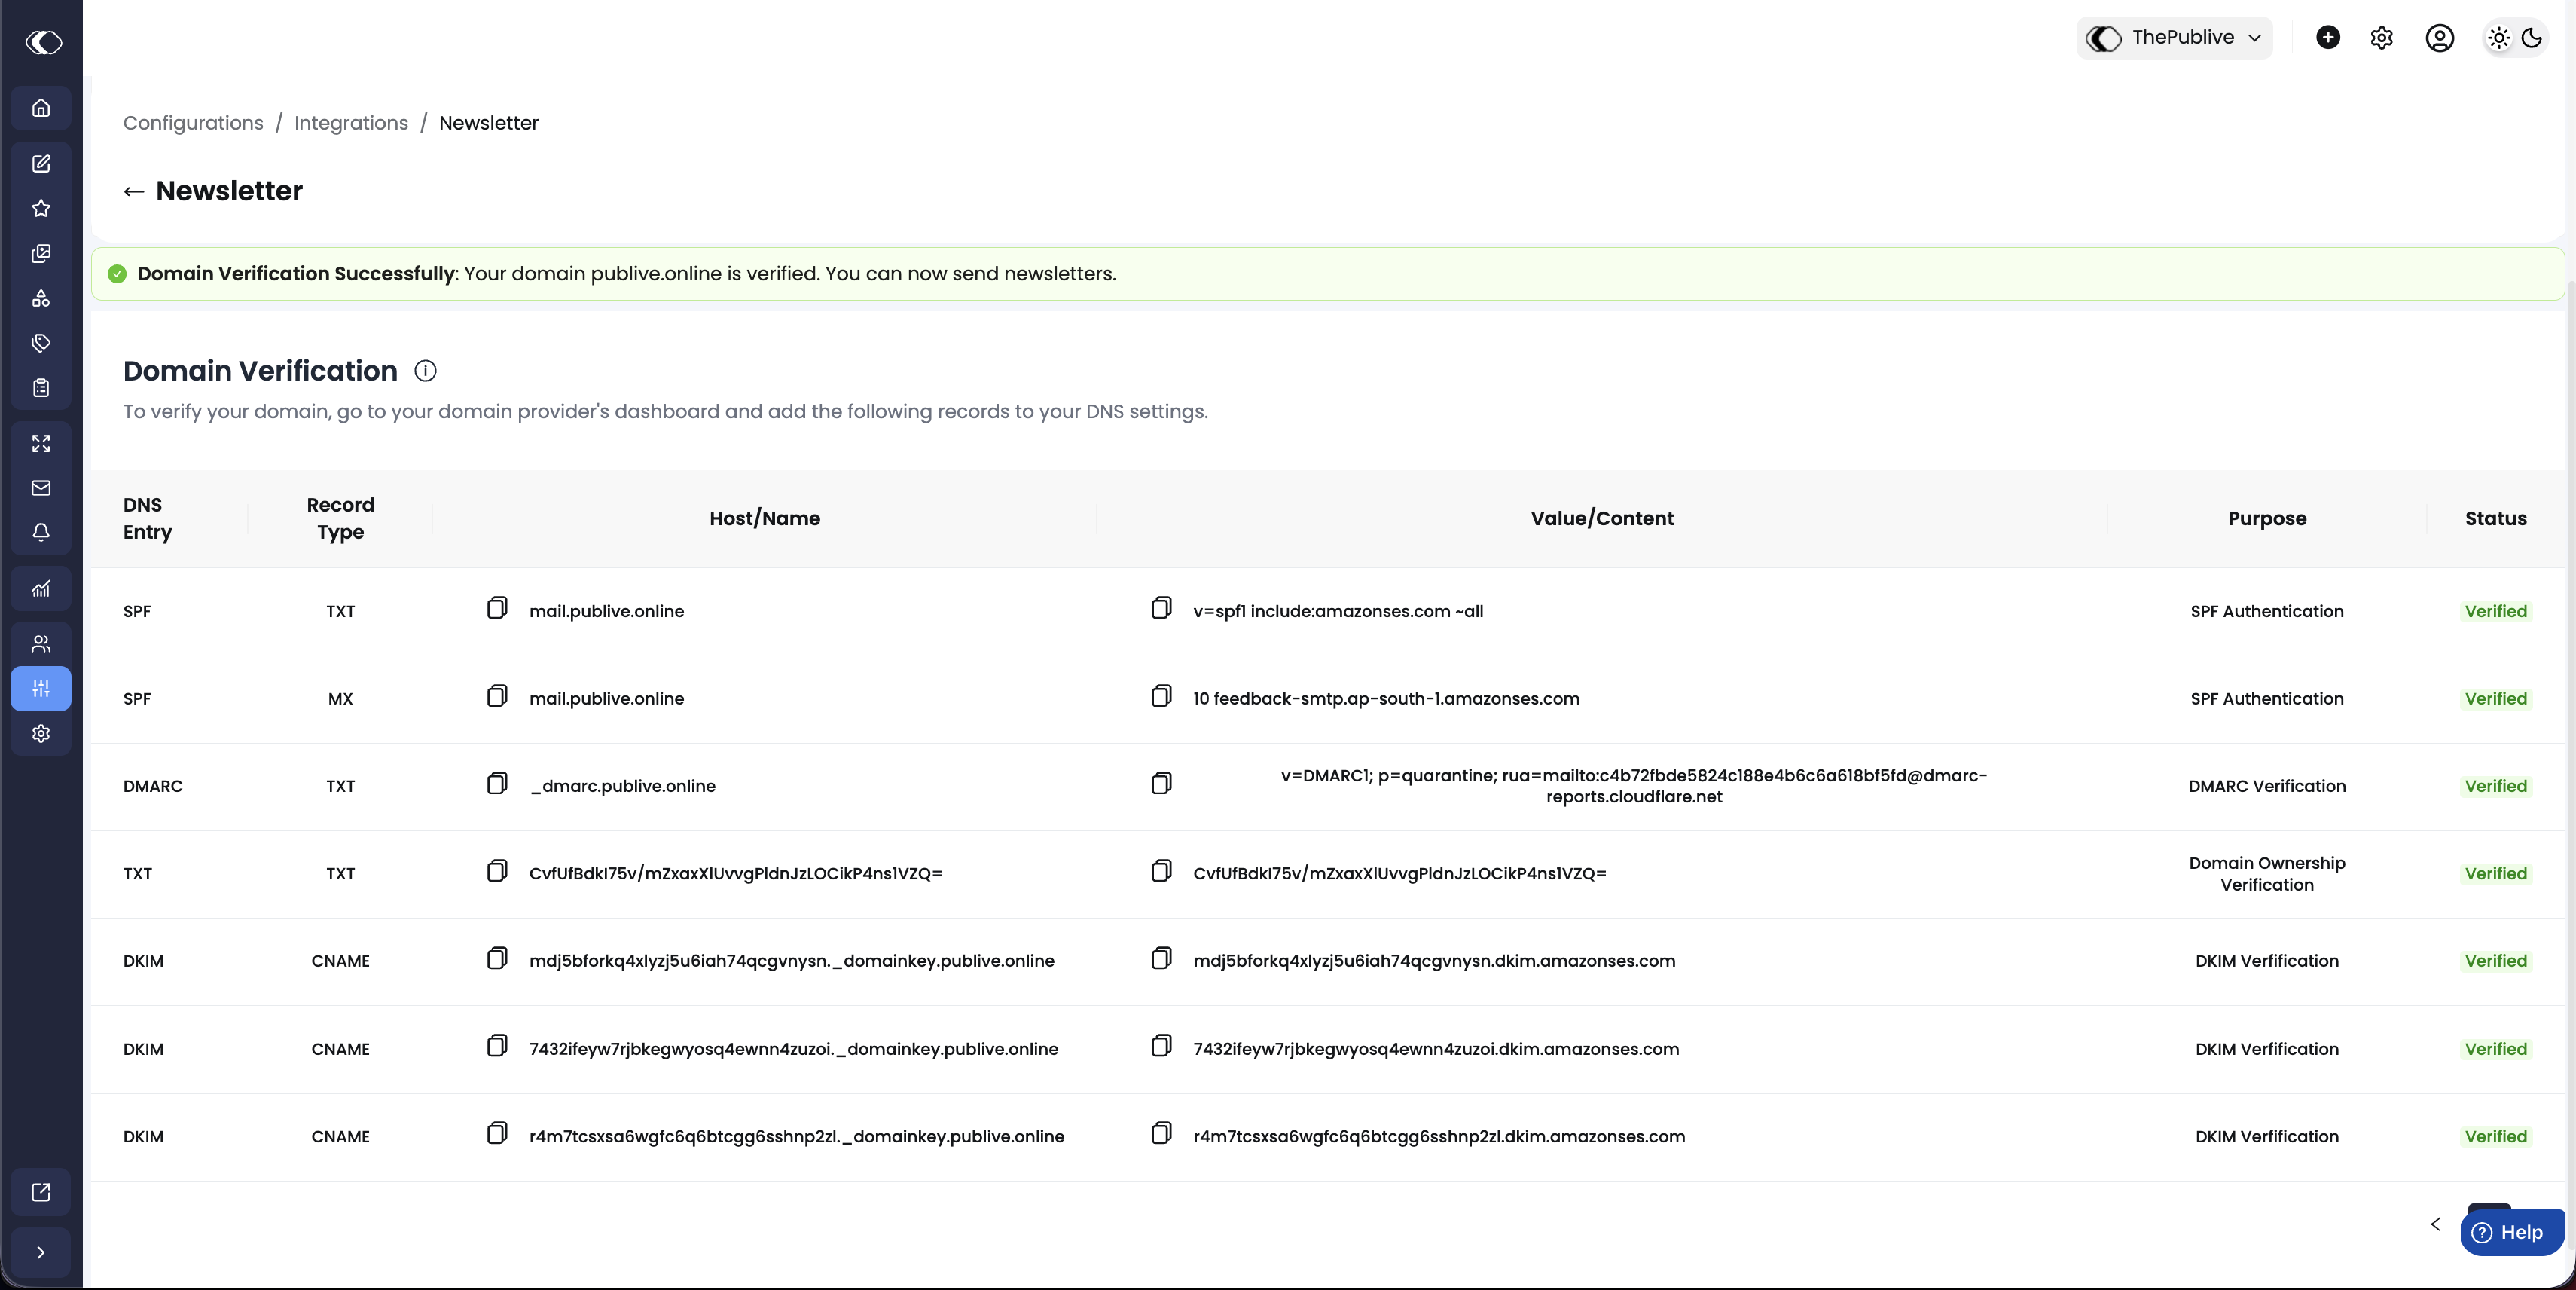
Note: These Newsletters Records can be found on the dashboard
Steps : Dashboard → Configuration → Integrations → Distribution → Newsletter → Manage
Was this article helpful?
That’s Great!
Thank you for your feedback
Sorry! We couldn't be helpful
Thank you for your feedback
Feedback sent
We appreciate your effort and will try to fix the article